1NanoIP X AdsPower
Use different network environments for different accounts.
1.1Before setup
- Proxy protocol: HTTP, HTTPS, or SOCKS5.
- Proxy address.
- Proxy port.
- Proxy username.
- Proxy password.
- Target country or region.
- Static proxy validity or dynamic proxy traffic balance.
For long-term account environments, static ISP proxies are usually the better first choice.
1.2Buy a proxy
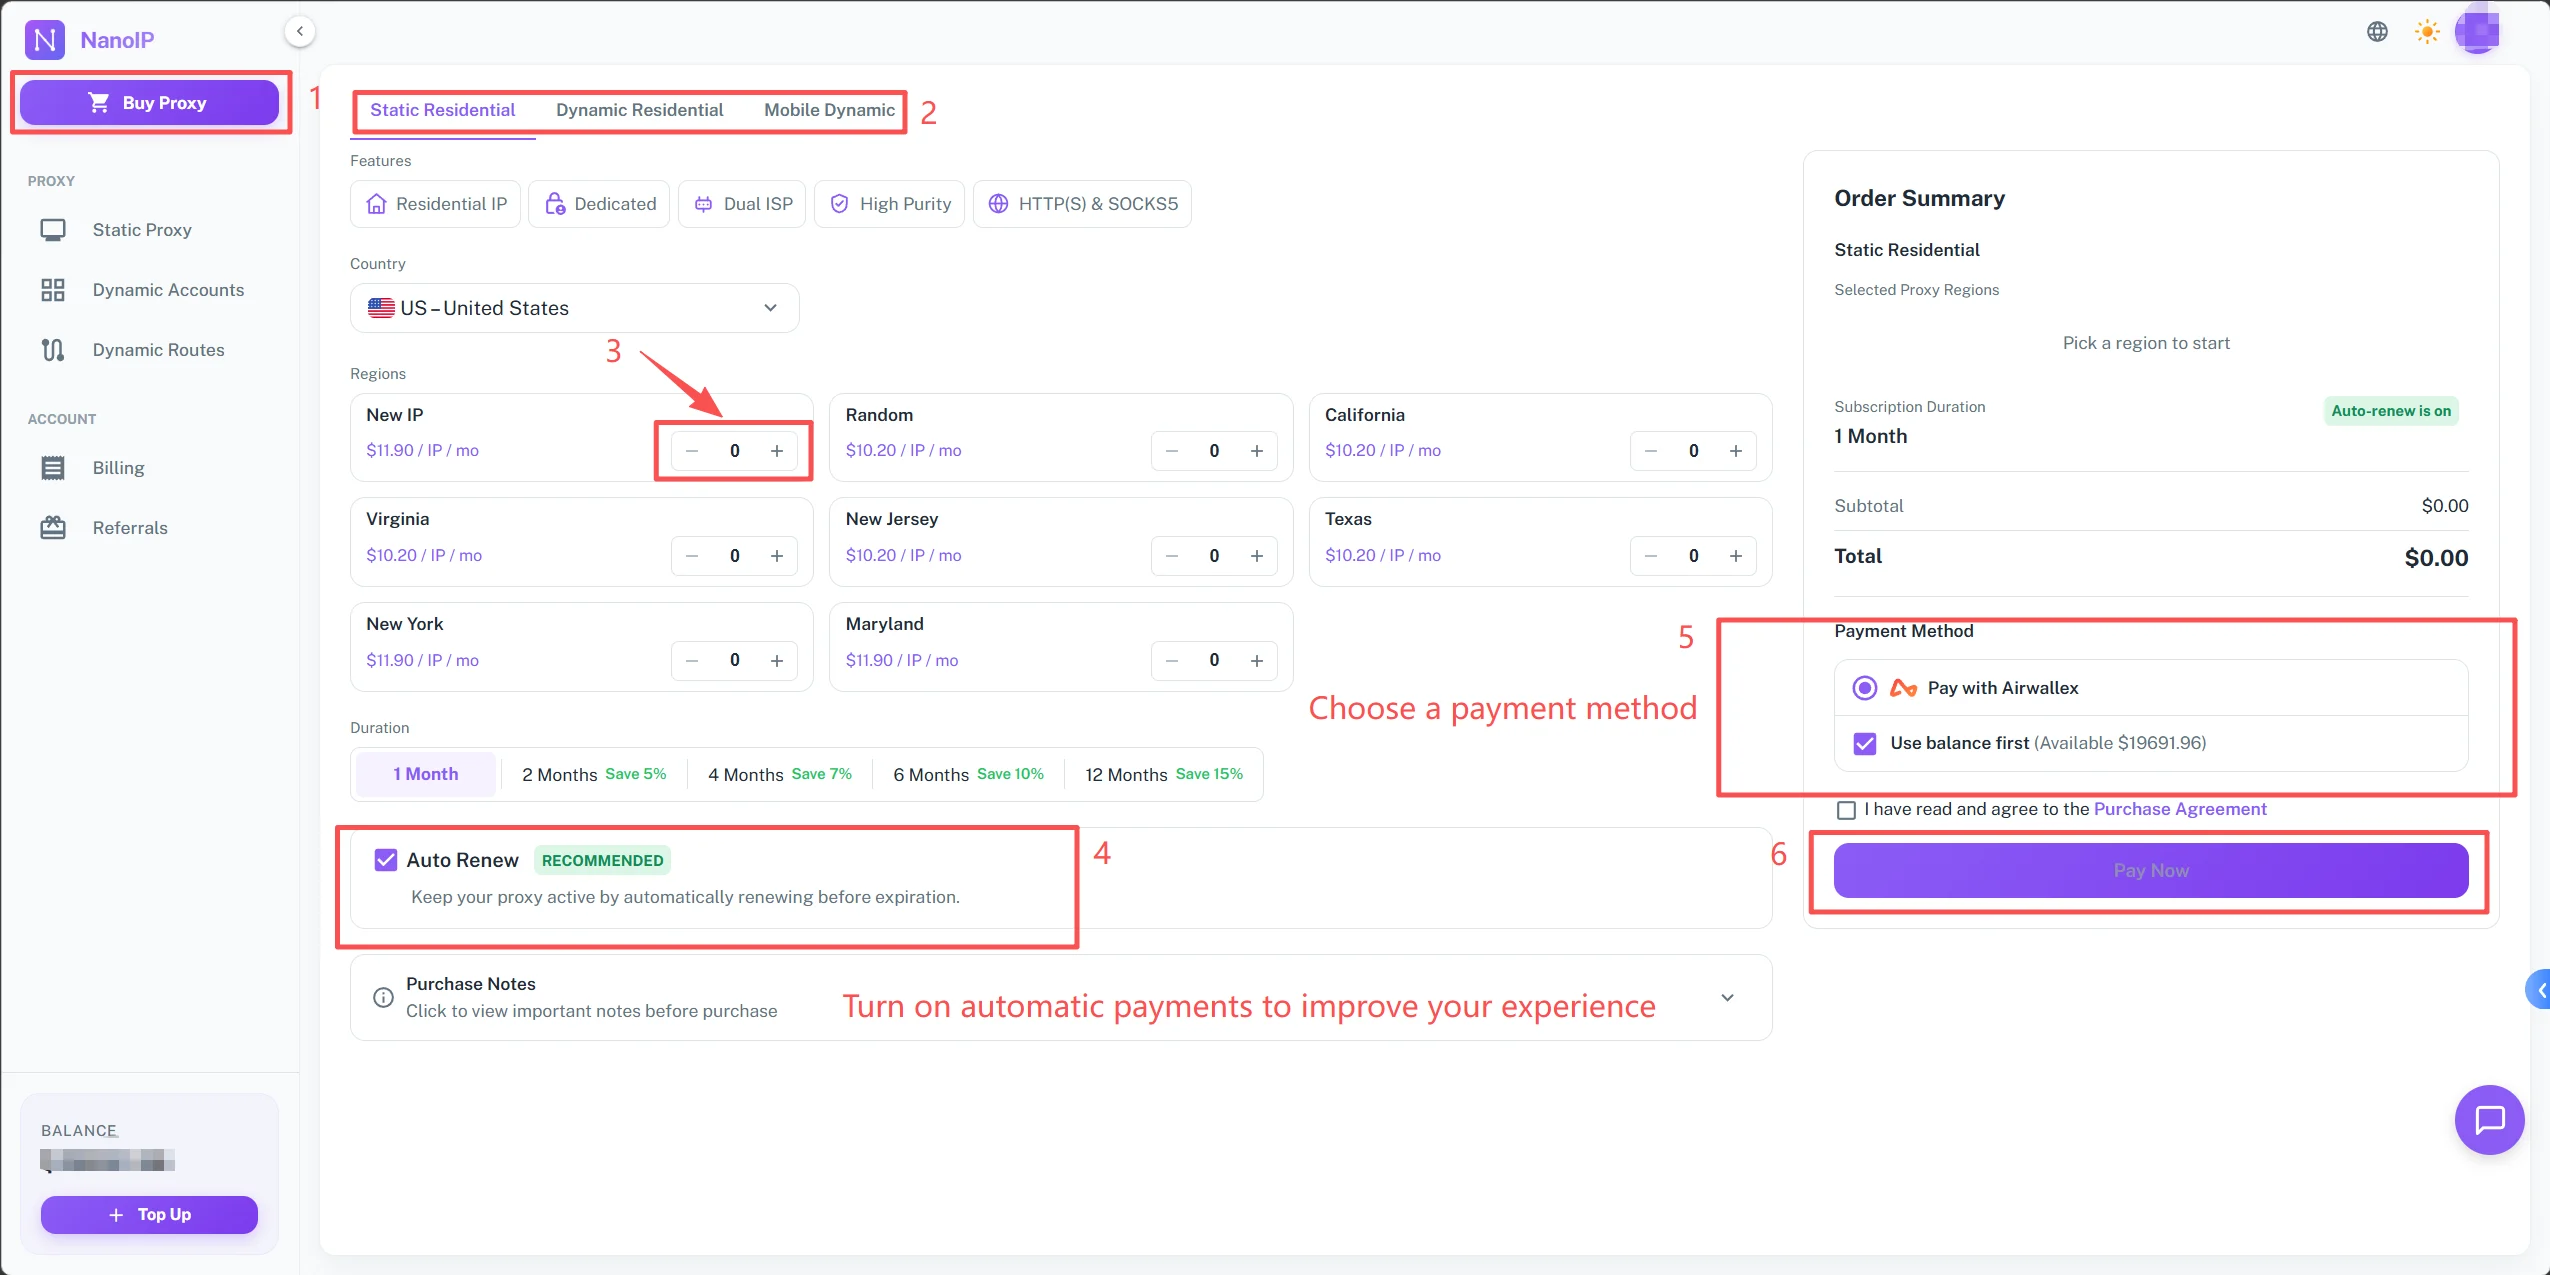
After registering and signing in to NanoIP, click Purchase Proxy in the upper-left area, choose the product that fits your workflow, and complete the purchase.
1.3Copy proxy details
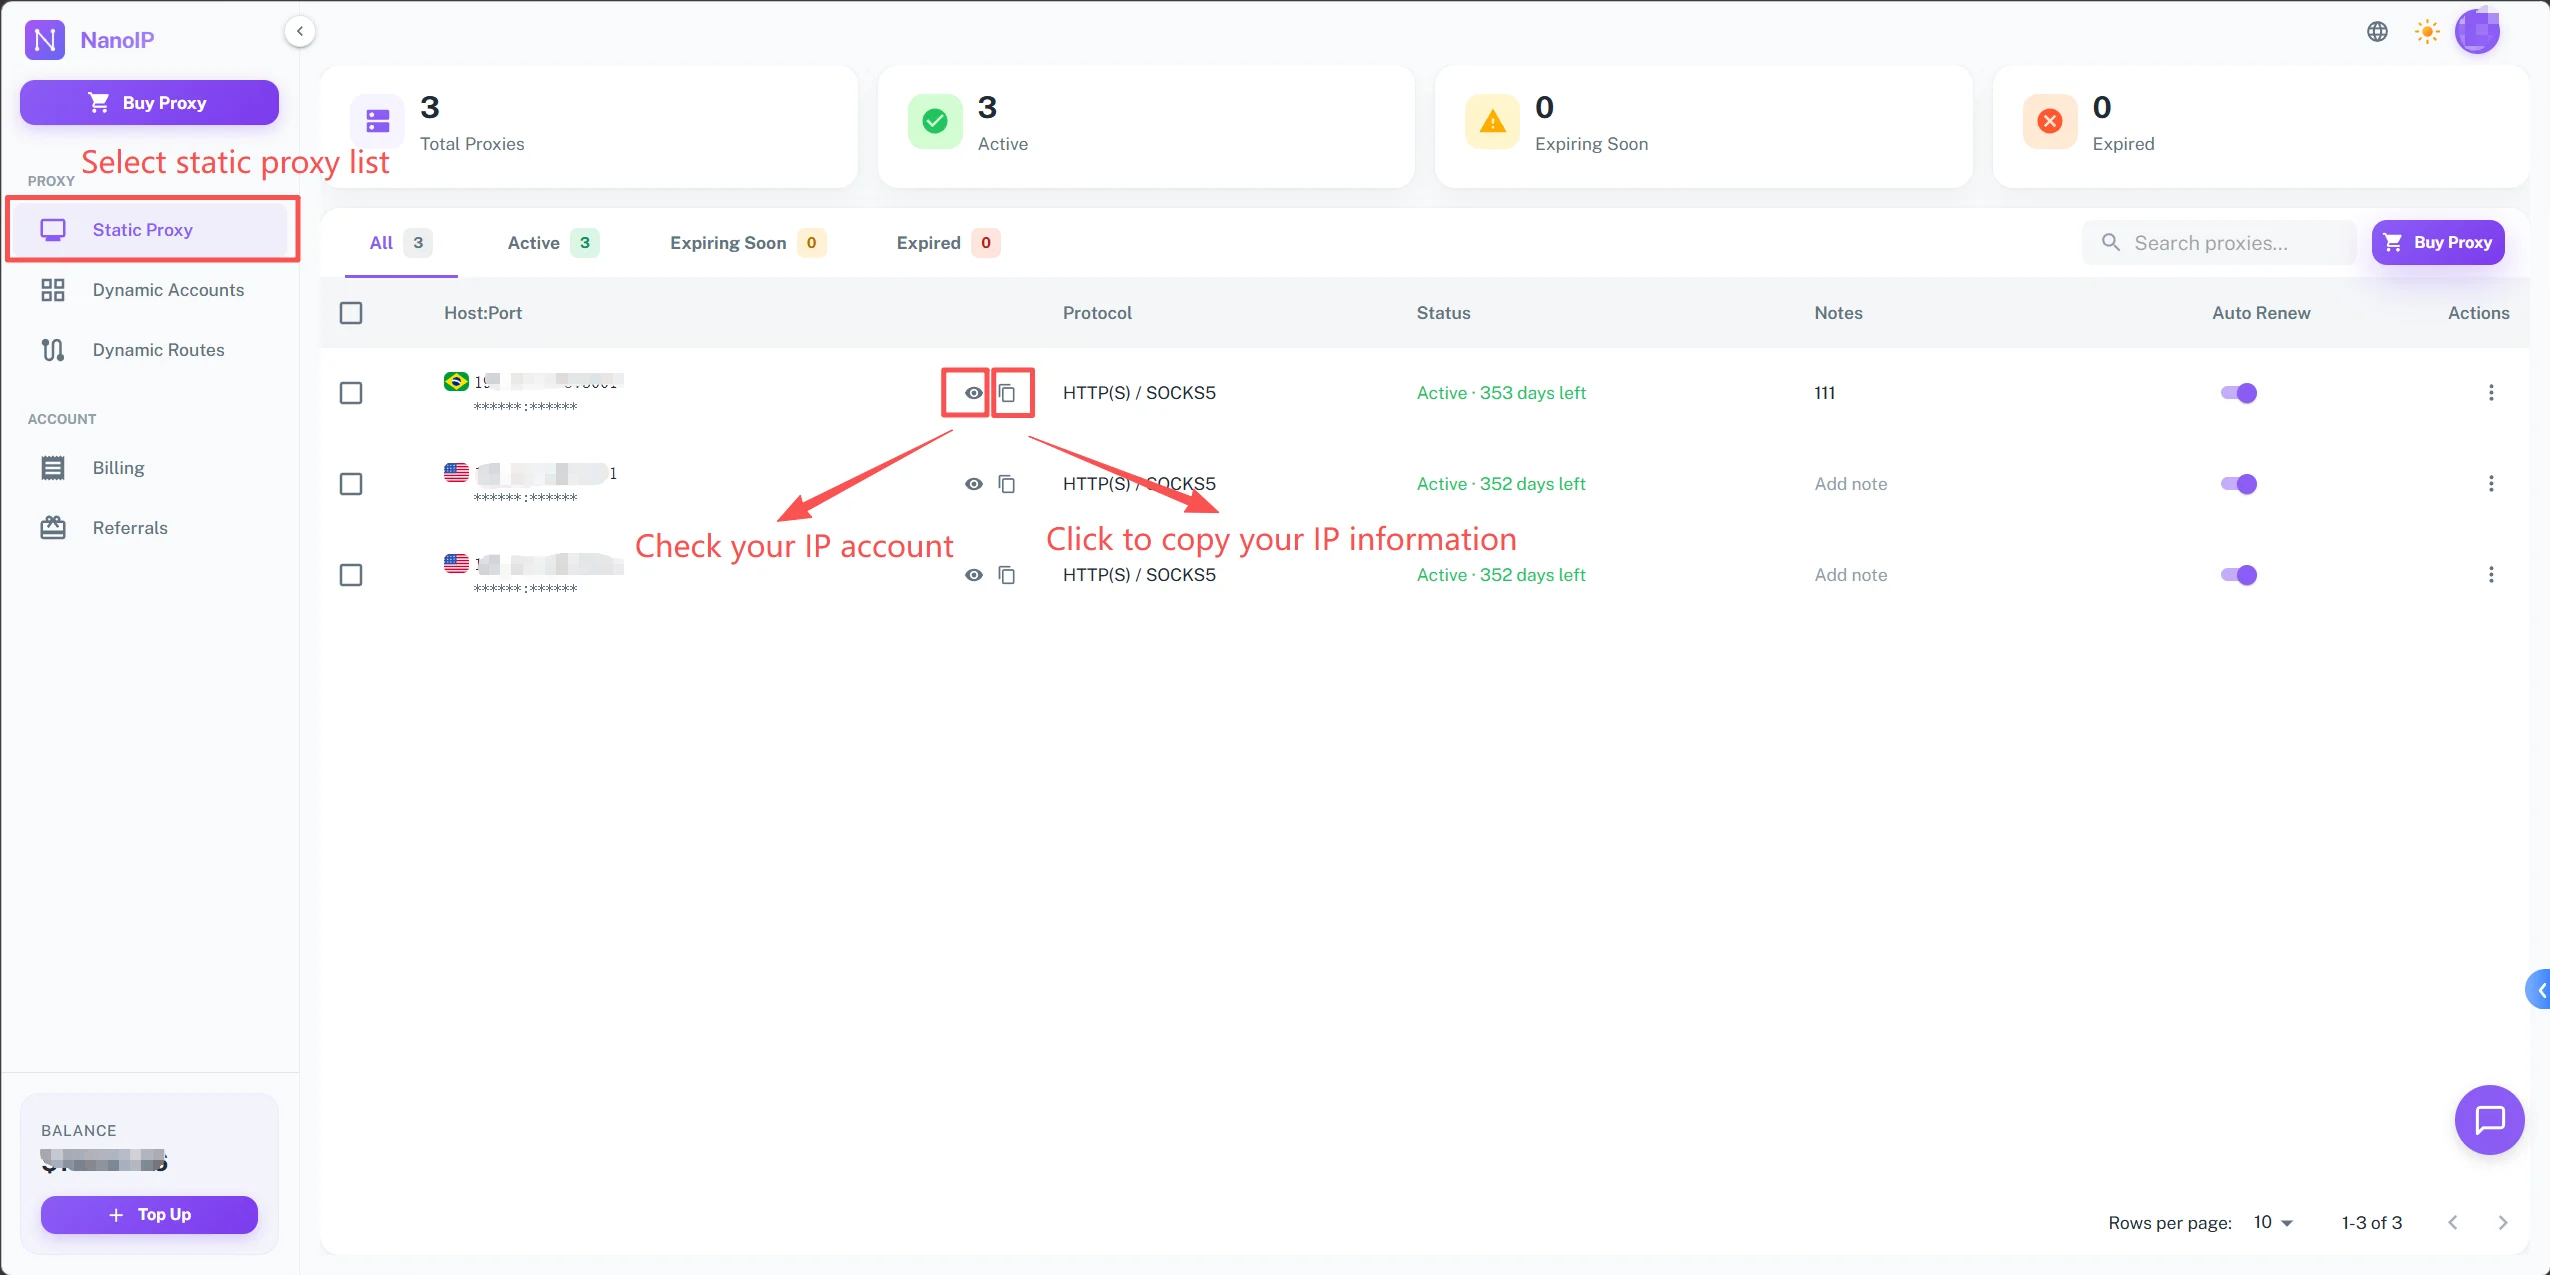
After purchase, open the related proxy list, click Proxy Details, find the IP you ordered, and use one-click copy to get the proxy information.
1.4Import the proxy into AdsPower
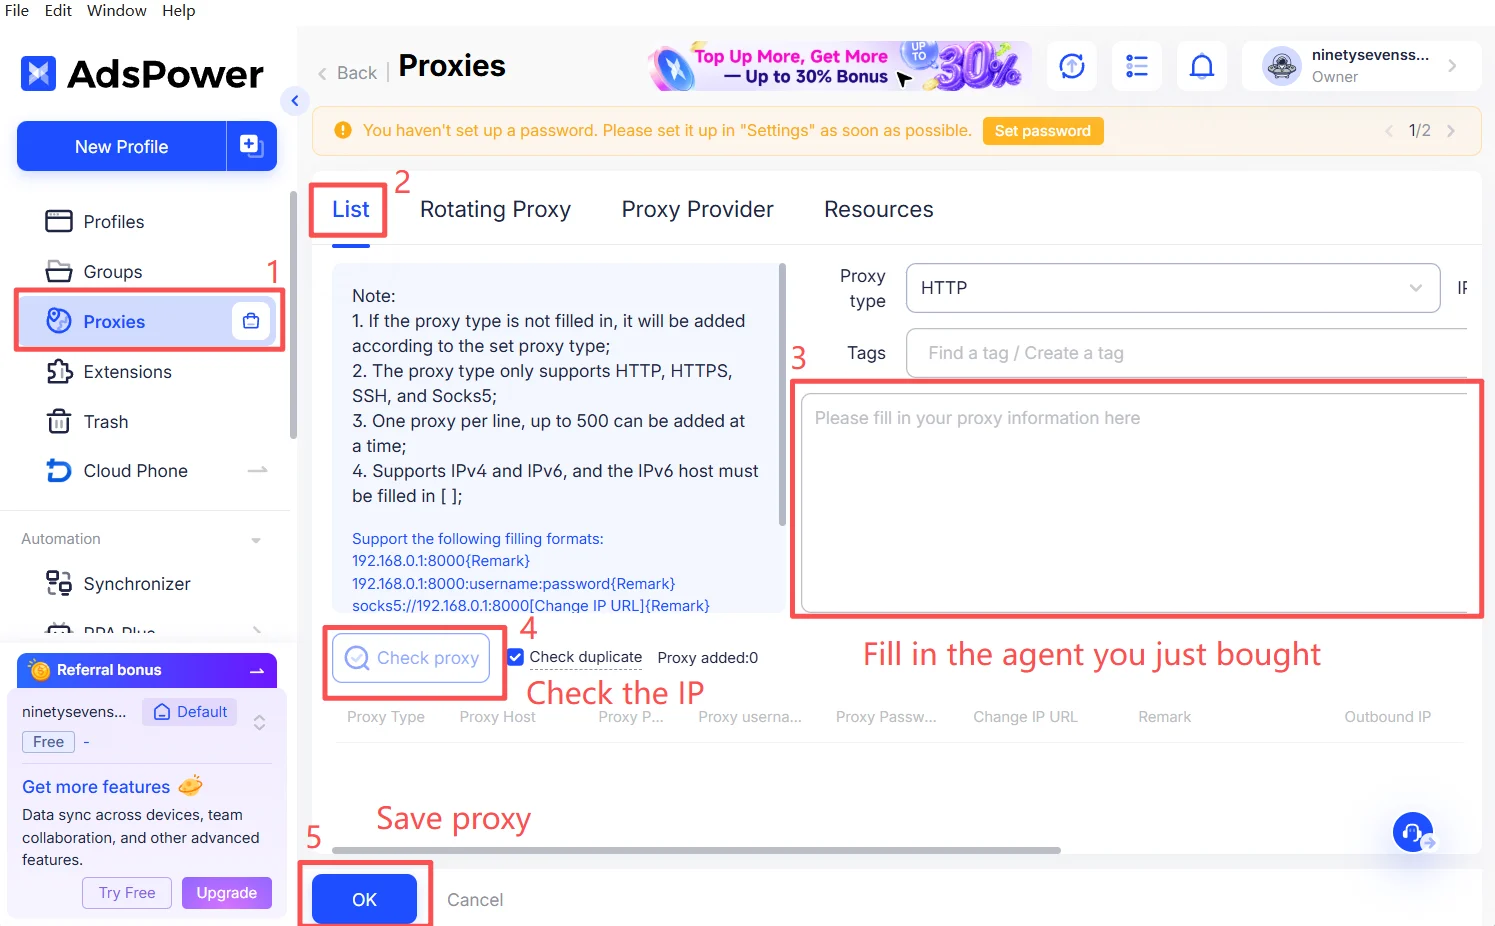
Open AdsPower, go to Proxy Management, choose Add Proxy, and paste the copied proxy information.
Click New Browser and select the added proxy under saved proxies.
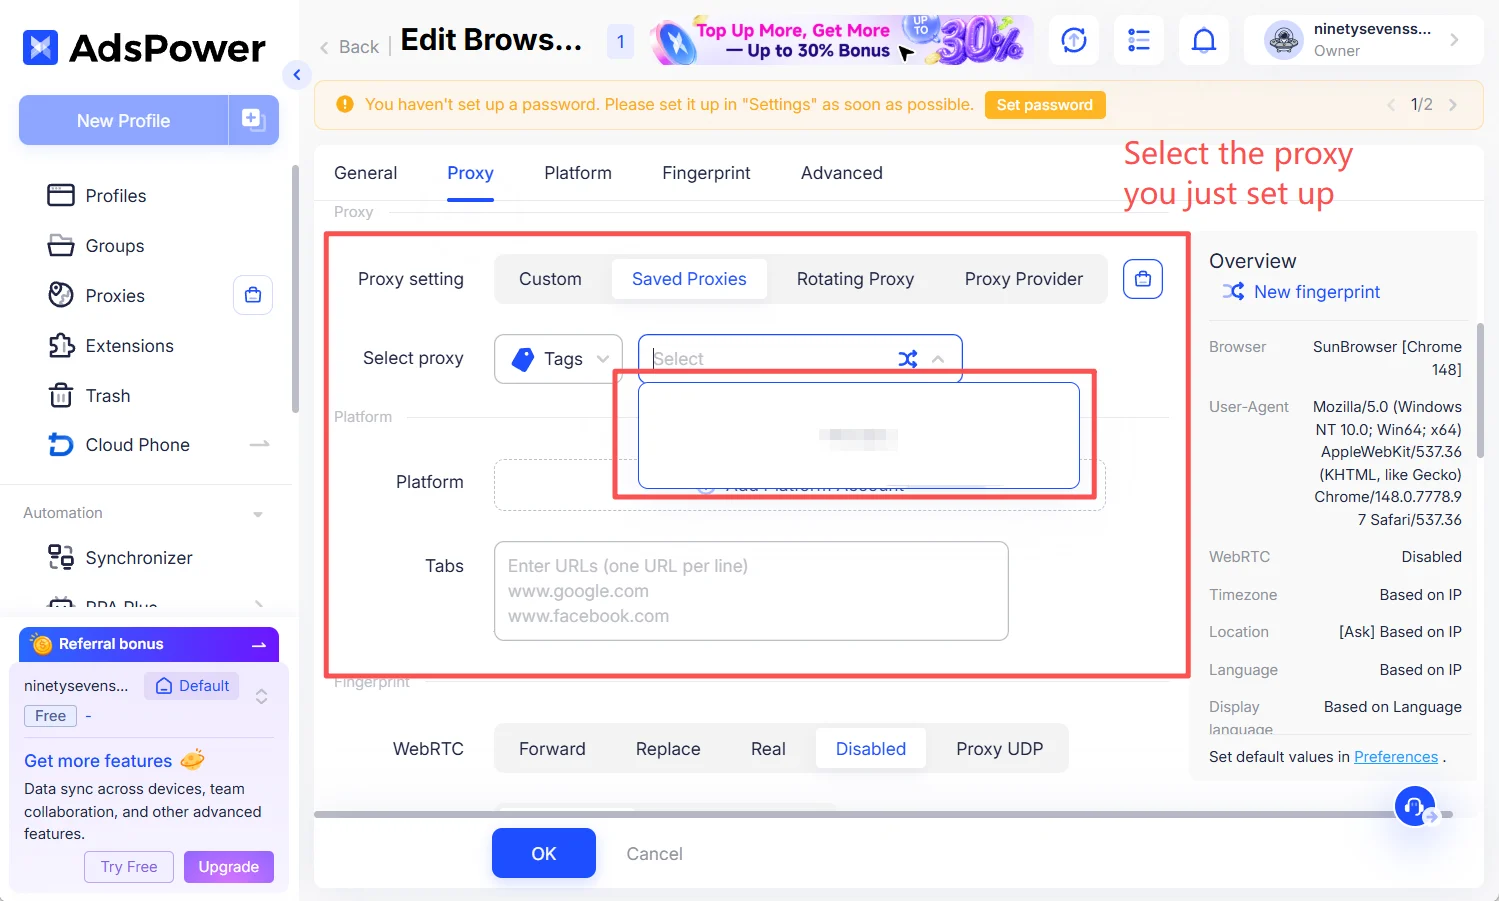
After configuration, open the browser and visit the target content to verify the setup.